Blogger Tips
In today's Blogger tutorial (Blogspot tutorial) I will show you how to both add a background image to a Blogger template if you don't have one already or change the existing background of your Blogger template.
I have chosen to write this article not because there aren't any how to articles already on the net but because they assume quite a bit of knowledge. I have taken a different tack with this post in that I assume you are an absolute beginner with no knowledge of Blogger templates.
For this reason I have provided some sample backgrounds for you to play around with. By just cutting and pasting these images you can see first hand how dramatically adding a different background to your Blogger template can change it. You will see that replacing your background image with these images isn't that difficult and hopefully it will give the confidence to branch out further and change the background of your Blogger template to suit your own needs. All that is needed is to insert a small snippet of code into the CSS styling section of your Blogger template and hey presto your Blogger template will take on a whole new look.
How to Change the Color of a Blogger Background (Default Templates)
If you are using a default Blogger template then you already have the option to change the background color to your own taste by going to Layout > Fonts and Colors. Some third party custom Blogger templates have this option too but by no means all. For instructions on changing the background color of custom templates see tips and troubleshooting below.
How to Add a Background Image to a Blogger Template
Tips and Troubleshooting
Today's Blogger tutorial (Blogspot tutorial) aimed at Blogger beginners continues the series on CSS styling for Blogger. You have learned how to add the background image to your Blogger template or change the existing background image. To help you gain confidence in changing the background image I have provided some sample images for you to practise with. Also in this Blogger tutorial you have learned how to change the color of your Blogger background if you prefer a plain solid background color rather than a background image. As always if you strike any problems implementing the tips in this tutorial please let me know.
Related Articles
List of Blog Know How Tutorials for Blogger Blogs
How to Add, Delete or Remove Blogger Image Borders
How to Align and Justify Posts in Blogger
How to Add a Divider Between Blogger Posts
- How To Customize Blogger's Lightbox
For those of you who have chosen to use the Blogger's Lightbox View for displaying pictures when clicking on them, you have the option to change its style in a whole different way. You will be able to change the black color of the screen, the border...
- How To Add Different Background Color Or Image In Each Blogger Post
When you have multiple authors on a Blogger blog and want to make a specific post stand-out, you can change anytime the background color of your posts or apply a background image behind them. And this can be easily done by wrapping the post's HTML...
- Remove Image Border In Default Blogger Templates Simple And Awesome Inc
In this Blogger tutorial I show you how to remove the border around images in Blogger posts (Blogspot posts) when using one of the latest default Blogger templates Simple or Awesome Inc. If you are using an older generation Blogger template or a custom...
- Add A Post Divider Between Blogger Posts
In today's Blogger tutorial I show you how to enhance your Blogger blog (Blogspot blog) by adding a post divider to your Blogger template. Used effectively post dividers can really jazz up your blog and will lend it that individual feel which most...
- Blogger Post Image Borders Change Or Remove
Sometimes you may want to remove, delete or change the image border of a custom Blogger template or default Blogger template (Blogspot template). In this Blogger tutorial you will learn how easy it is to make changes to your template so that you can get...
Blogger Tips
Add or Change Background Image of a Blogger Template
In today's Blogger tutorial (Blogspot tutorial) I will show you how to both add a background image to a Blogger template if you don't have one already or change the existing background of your Blogger template.
I have chosen to write this article not because there aren't any how to articles already on the net but because they assume quite a bit of knowledge. I have taken a different tack with this post in that I assume you are an absolute beginner with no knowledge of Blogger templates.
For this reason I have provided some sample backgrounds for you to play around with. By just cutting and pasting these images you can see first hand how dramatically adding a different background to your Blogger template can change it. You will see that replacing your background image with these images isn't that difficult and hopefully it will give the confidence to branch out further and change the background of your Blogger template to suit your own needs. All that is needed is to insert a small snippet of code into the CSS styling section of your Blogger template and hey presto your Blogger template will take on a whole new look.
How to Change the Color of a Blogger Background (Default Templates)
If you are using a default Blogger template then you already have the option to change the background color to your own taste by going to Layout > Fonts and Colors. Some third party custom Blogger templates have this option too but by no means all. For instructions on changing the background color of custom templates see tips and troubleshooting below.
How to Add a Background Image to a Blogger Template
- Log in to Blogger if not already logged in
- Go to Layout > Edit HTML
- Back up your Blogger template as a precaution by downloading the full template to your computer
- Find the following line in your Blogger template
body {
- Add the following line directly after this line
background-image: url(URL address of your image);
Your block of code will now look like this:body {
background-image: url(URL address of your image);
(existing code in this block)
} - Now replace the code in red for the URL address of your image. Choose an image from the selection below to practise with or use your own image. Note if using your own image make sure you read the tips and troubleshooting section below.

blogger-tips/blogger-tips-576b22b7d76c1.gif
blogger-tips/blogger-tips-576b22b7d83e6.gif
blogger-tips/blogger-tips-576b22b7d91f9.gif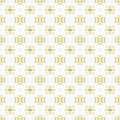
blogger-tips/blogger-tips-576b22b7d9fdf.gif
blogger-tips/blogger-tips-576b22b7dab79.gif
Green Paws Background
blogger-tips/blogger-tips-576b22b7db6c9.gif
Musical Notes Background
blogger-tips/blogger-tips-576b22b7dc21e.gif - Use the Preview button to see the effect of these different backgrounds on your template. It will help you get an idea of the kind of possibilities out there.
- You are welcome to use one of the above Blogger backgrounds as they are all free to use without any restriction. If you decide to use one of these simply click on Save Template and you are in business. Alternatively go ahead and find your own background image on the net and follow the instructions below to insert it into your Blogger template.
Tips and Troubleshooting
- To Add Your Own Image to a Blogger Template
There are huge number of backgrounds on the net that are suitable for Blogger. Search under free website backgrounds in your favorite search engine to find these.
Simply download your preferred background and save to an image service like Photobucket, Flickr.
Make sure the file format is either a .jpg, .gif or .png and that its size does not exceed 100kbs. As a rule of thumb an image size of around 30kb or less is about right if loading time speed is not to be compromised. Larger images can be resized quickly by using an online resizing service such as Shrink Pictures.
Follow the instructions above to change the URL to that of your image. - To Change the Background Color of Your Custom Blogger Template
If there is no option to change the background color of your Blogger template in Layout > Fonts and Colors you can still change the color manually.- Follow steps 1 to 4 as above
- Find the line beginning with :
background-color: #
- The hex color will be different for each template. We will change the color only
background-color: #change hex color code to your chosen color;
- Replace the existing hex color code with the value of your chosen hex color. List of web safe hex colors. For example insert the following code to change the background color to:
Denim Bluebackground-color: #336699;
Blackbackground-color: #000000;
Whitebackground-color: #ffffff;
- Use the Preview button to see the effect of each color before you save it.
- Once you are satisfied go ahead and click on Save Template
- Follow steps 1 to 4 as above
Today's Blogger tutorial (Blogspot tutorial) aimed at Blogger beginners continues the series on CSS styling for Blogger. You have learned how to add the background image to your Blogger template or change the existing background image. To help you gain confidence in changing the background image I have provided some sample images for you to practise with. Also in this Blogger tutorial you have learned how to change the color of your Blogger background if you prefer a plain solid background color rather than a background image. As always if you strike any problems implementing the tips in this tutorial please let me know.
Related Articles
List of Blog Know How Tutorials for Blogger Blogs
How to Add, Delete or Remove Blogger Image Borders
How to Align and Justify Posts in Blogger
How to Add a Divider Between Blogger Posts
- How To Customize Blogger's Lightbox
For those of you who have chosen to use the Blogger's Lightbox View for displaying pictures when clicking on them, you have the option to change its style in a whole different way. You will be able to change the black color of the screen, the border...
- How To Add Different Background Color Or Image In Each Blogger Post
When you have multiple authors on a Blogger blog and want to make a specific post stand-out, you can change anytime the background color of your posts or apply a background image behind them. And this can be easily done by wrapping the post's HTML...
- Remove Image Border In Default Blogger Templates Simple And Awesome Inc
In this Blogger tutorial I show you how to remove the border around images in Blogger posts (Blogspot posts) when using one of the latest default Blogger templates Simple or Awesome Inc. If you are using an older generation Blogger template or a custom...
- Add A Post Divider Between Blogger Posts
In today's Blogger tutorial I show you how to enhance your Blogger blog (Blogspot blog) by adding a post divider to your Blogger template. Used effectively post dividers can really jazz up your blog and will lend it that individual feel which most...
- Blogger Post Image Borders Change Or Remove
Sometimes you may want to remove, delete or change the image border of a custom Blogger template or default Blogger template (Blogspot template). In this Blogger tutorial you will learn how easy it is to make changes to your template so that you can get...
